Simulate another survey height
Simulate a different height estimates solar exposure and PV production at roof level, even when the horizon profile was captured from the ground. It reconstructs the change in viewpoint using the profile and obstacle distances. It does not directly measure the height of trees or buildings.
When should I use it?
Section titled “When should I use it?”For example, you surveyed from the ground near a building. Trees and buildings appear higher from that position than from the planned panel area. The simulation estimates their effect from a higher level without requiring a second survey on the roof.
The result depends on the survey position, capture height and selected obstacle distances, among other factors. Treat it as an estimate.
Open and configure the simulation
Section titled “Open and configure the simulation”- In Overview, tap Simulate a different height, or open it from Horizon profile and shading in settings.
- Enter Roof height in meters above ground level at the survey position.
- Expand Survey height and check the actual capture height. A default of 1.60 m may be offered; correct it if necessary.
- Adjust roof height with the slider or numeric field.
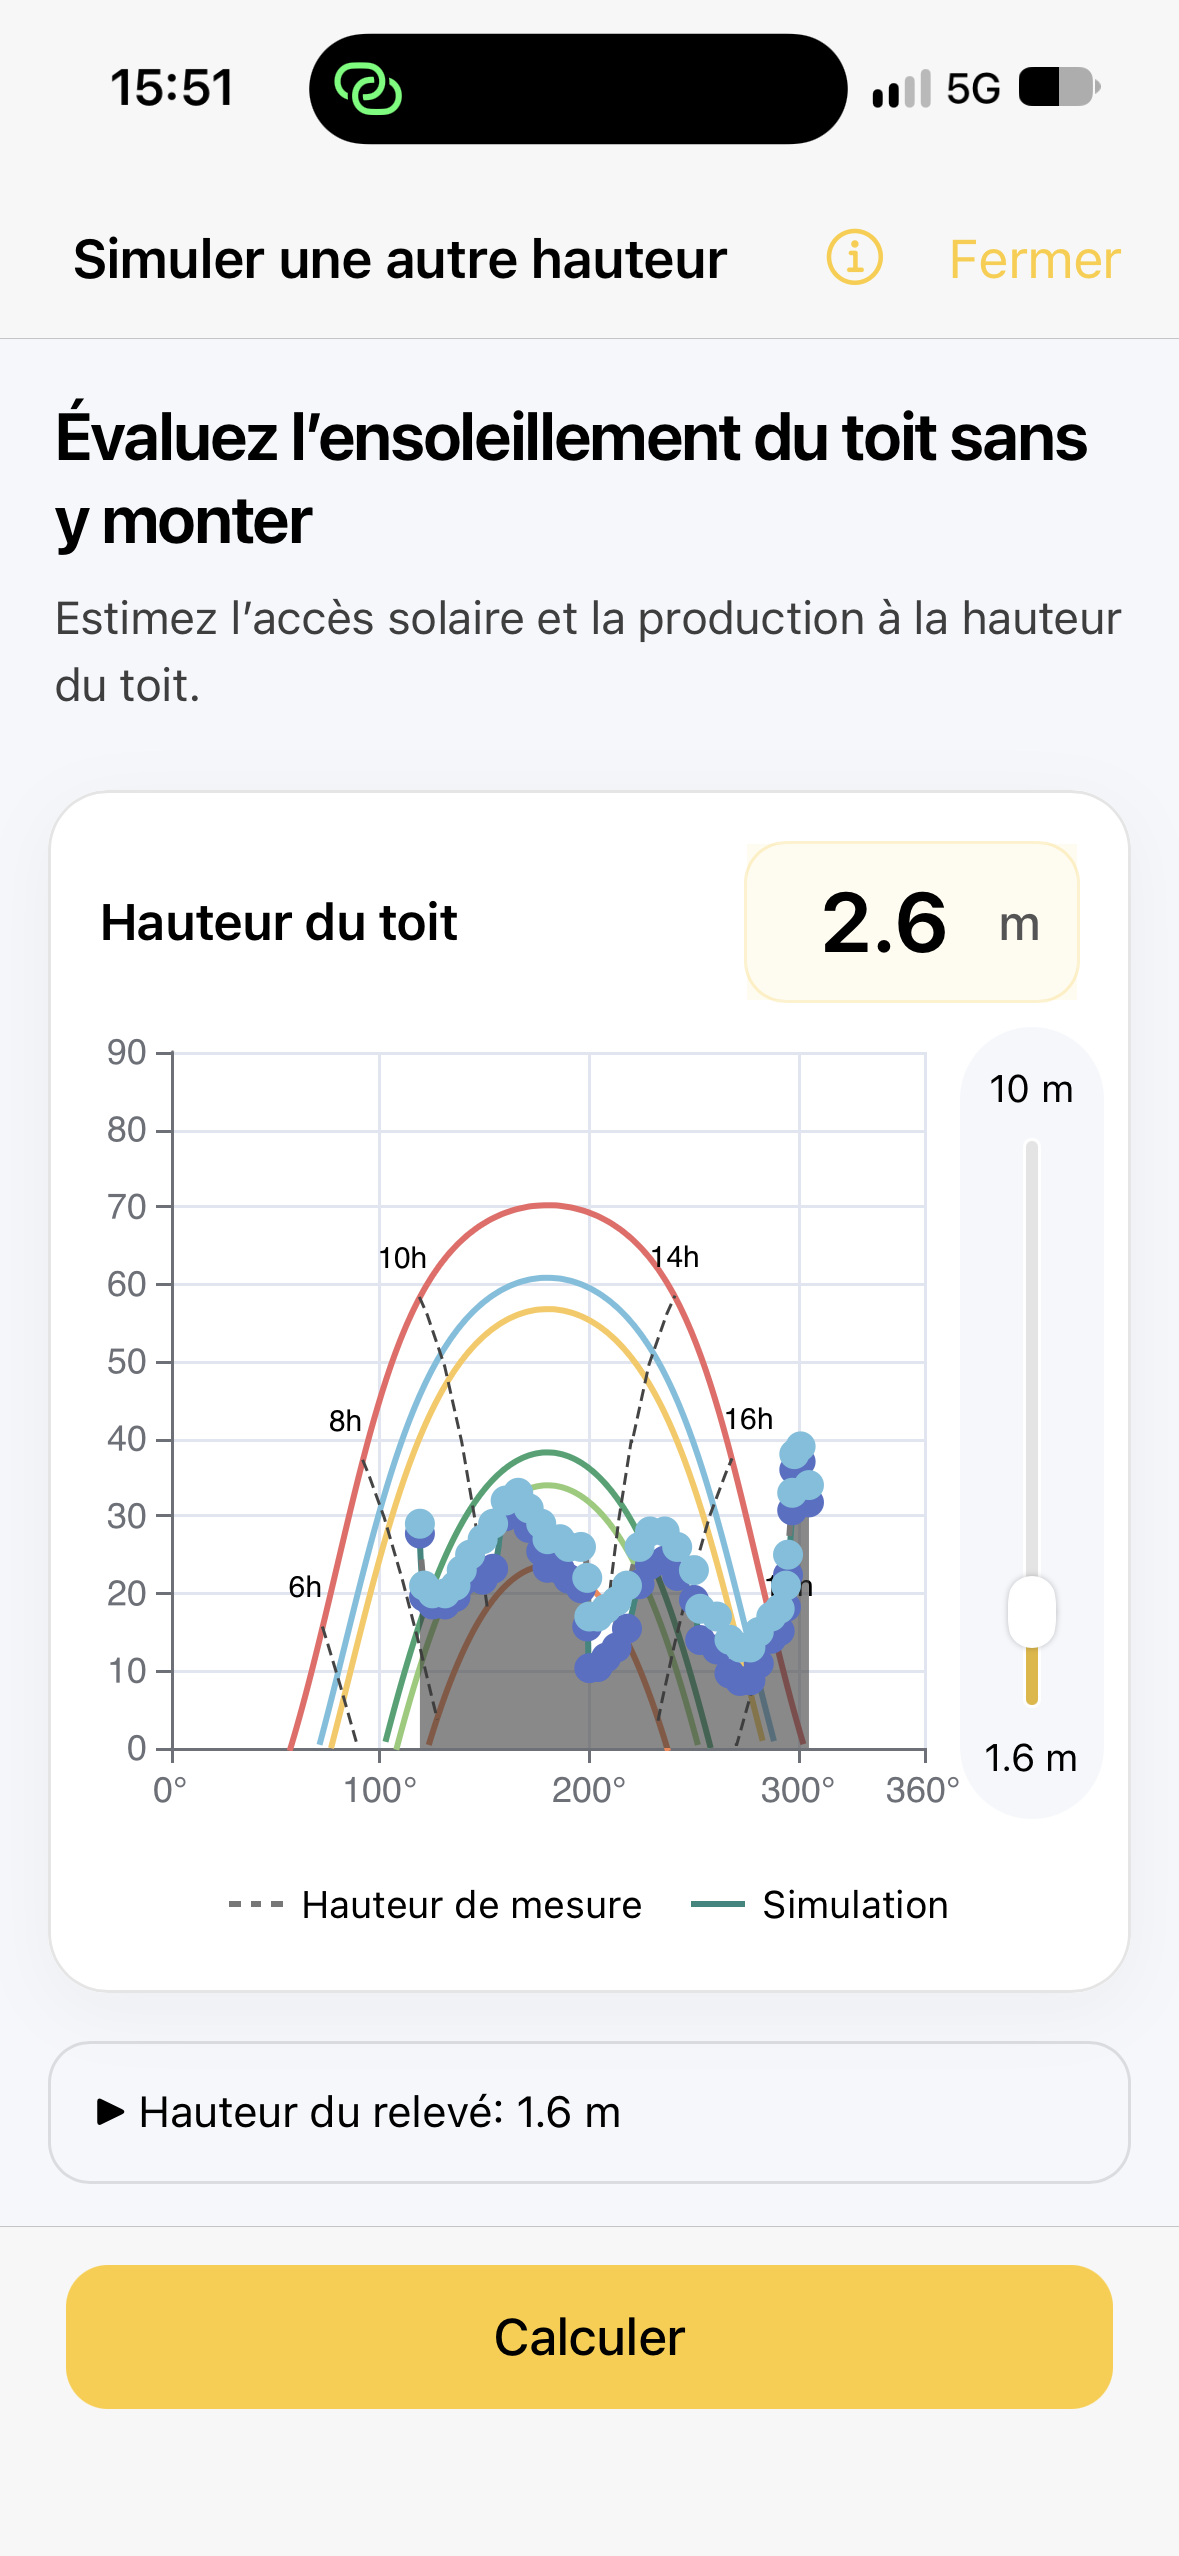
The two heights are not interchangeable. If the phone was at 1.60 m and the roof is at 5.00 m, the simulated displacement is +3.40 m. This difference, not the total roof height, appears in the results after applying.
Where distances allow, the chart compares the profile at measurement height with the simulation. Sun paths remain visible to help interpret possible obstacle effects.
Check obstacle distances
Section titled “Check obstacle distances”The simulation needs consistent distances to correct the apparent elevation of each part of the horizon. Azimutis may suggest map outlines and distances, but you must check them.
- Open Check distances.
- Check the survey position, rays and identified obstacles on the map.
- Draw or correct outlines where needed, particularly for missing or ambiguous directions.
- Tap Use these distances to return to the simulation.
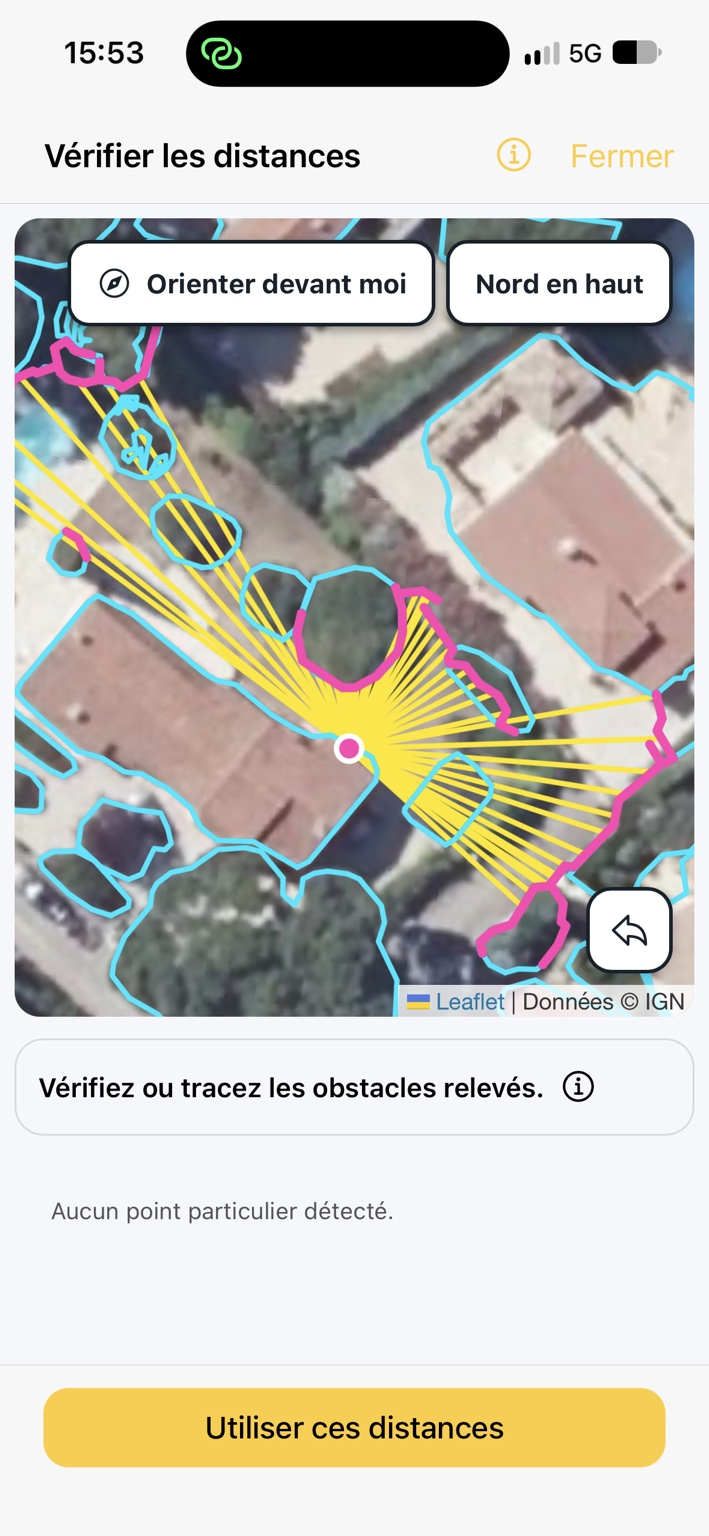
See Check distances for simulated height for the full procedure.
Calculate and compare
Section titled “Calculate and compare”- Tap Calculate.
- Review the chart showing measurement height and simulation.
- Compare annual production (kWh/year) and solar access (%) for the original survey and roof height.
- If distances look incorrect, return to Check distances, correct them and calculate again.
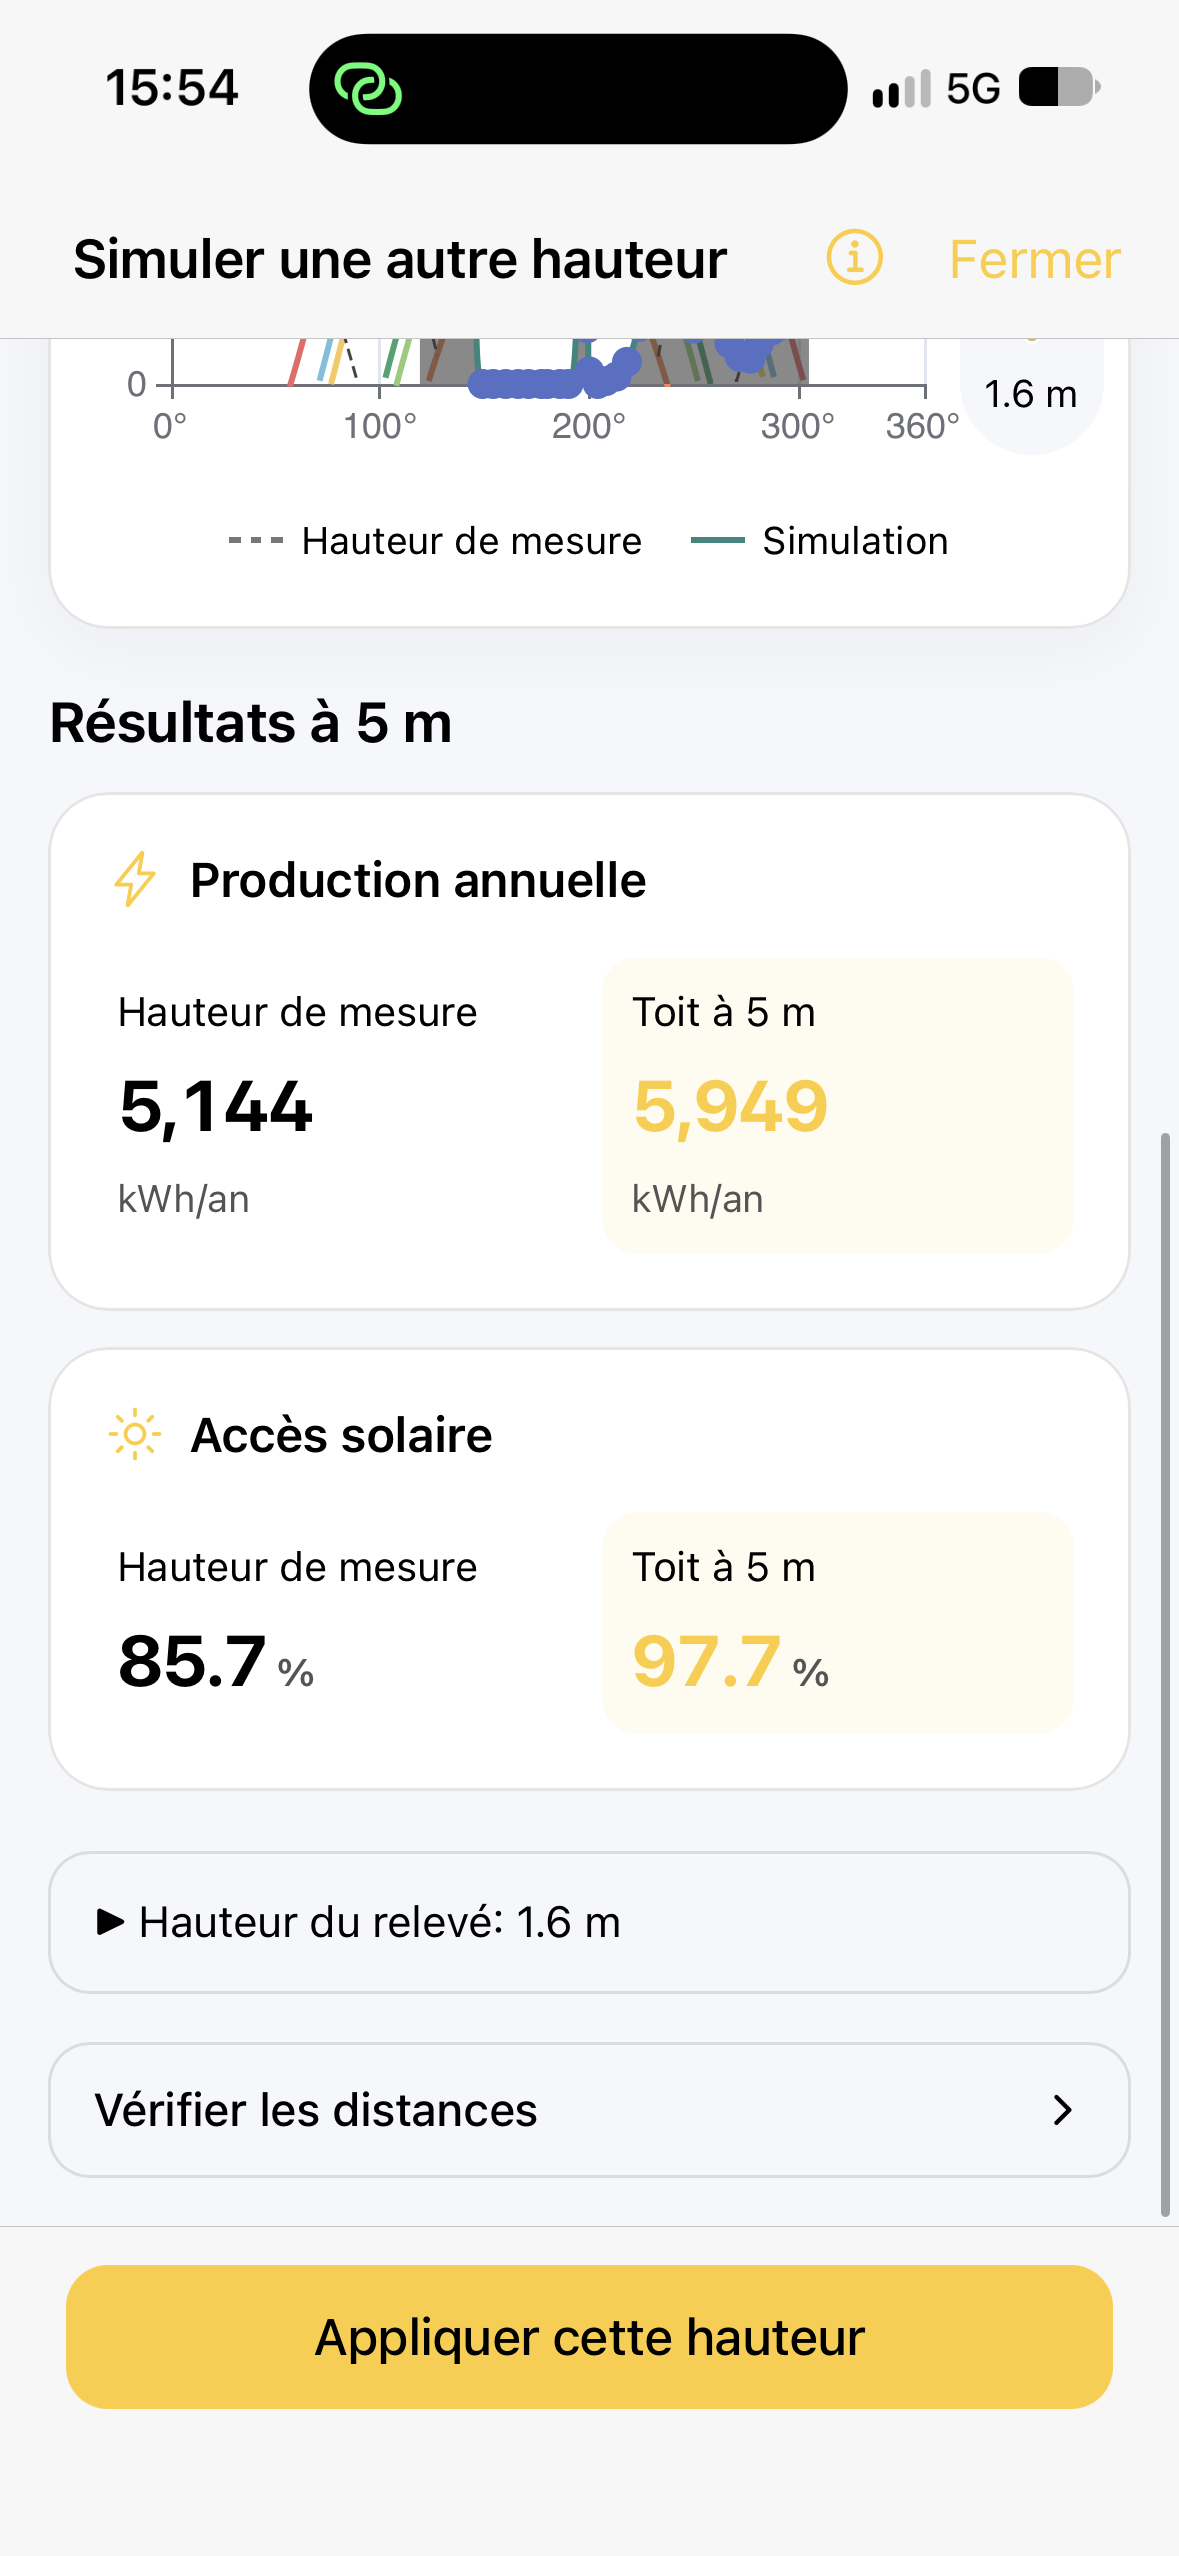
In the illustrated example, the survey was taken at 1.60 m and roof height is set to 5 m. The displayed comparison applies only to this example and does not predict gains at other sites.
Apply the new height
Section titled “Apply the new height”Tap Apply this height when the comparison matches the configuration you want to assess. Previewing alone does not change the project. Applying changes the horizon profile used by the assessment and updates the associated analyses.
A Simulated height: +X m banner then appears above the results tabs. The displayed profile and results relate to that simulated height.
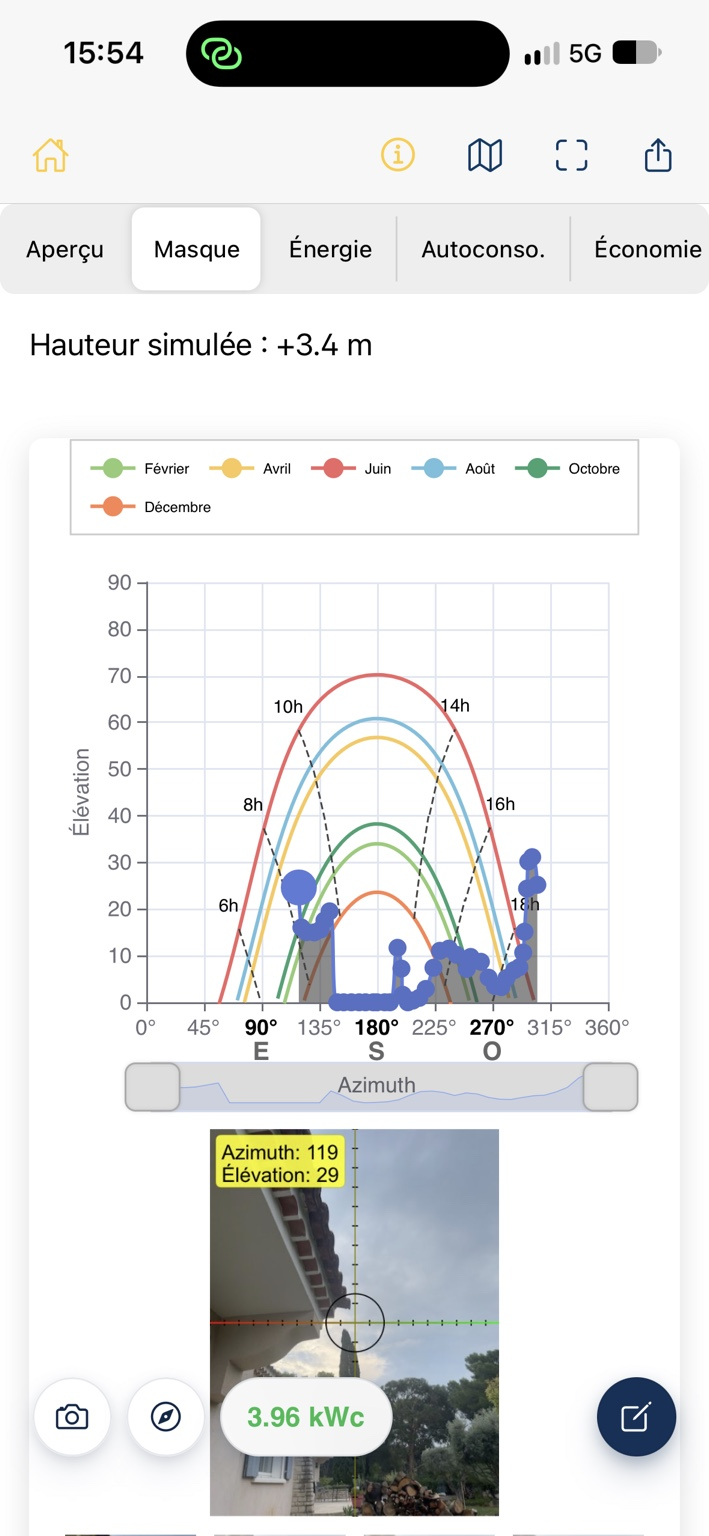
Accuracy limitations
Section titled “Accuracy limitations”- Automatic outlines and estimated distances may be incorrect or incomplete; compare the map with the site.
- Where distances are missing, the app may retain the original survey angle for those points. The result may therefore be only partly corrected.
- Ground elevation differences between the measurement position and obstacles are not resolved by a horizontal distance alone.
- The result is a preliminary assessment, not an obstacle-height measurement or production guarantee.
Related articles
Section titled “Related articles”- Check distances for simulated height
- Read and edit the horizon profile
- Understand the Overview tab
- Understand energy and production results
Projects with several planes
Section titled “Projects with several planes”In a multi-plane project, select the plane before editing its sizing, orientation, layout or height. Editing a shared survey affects every plane using it. Consumption, battery and economic assumptions remain common to the installation.