Set the roof plane direction
After you confirm the outline, Azimutis shows Roof direction. This step identifies which way the roof slopes down. It is not an arbitrary choice of which edge to start the layout from.
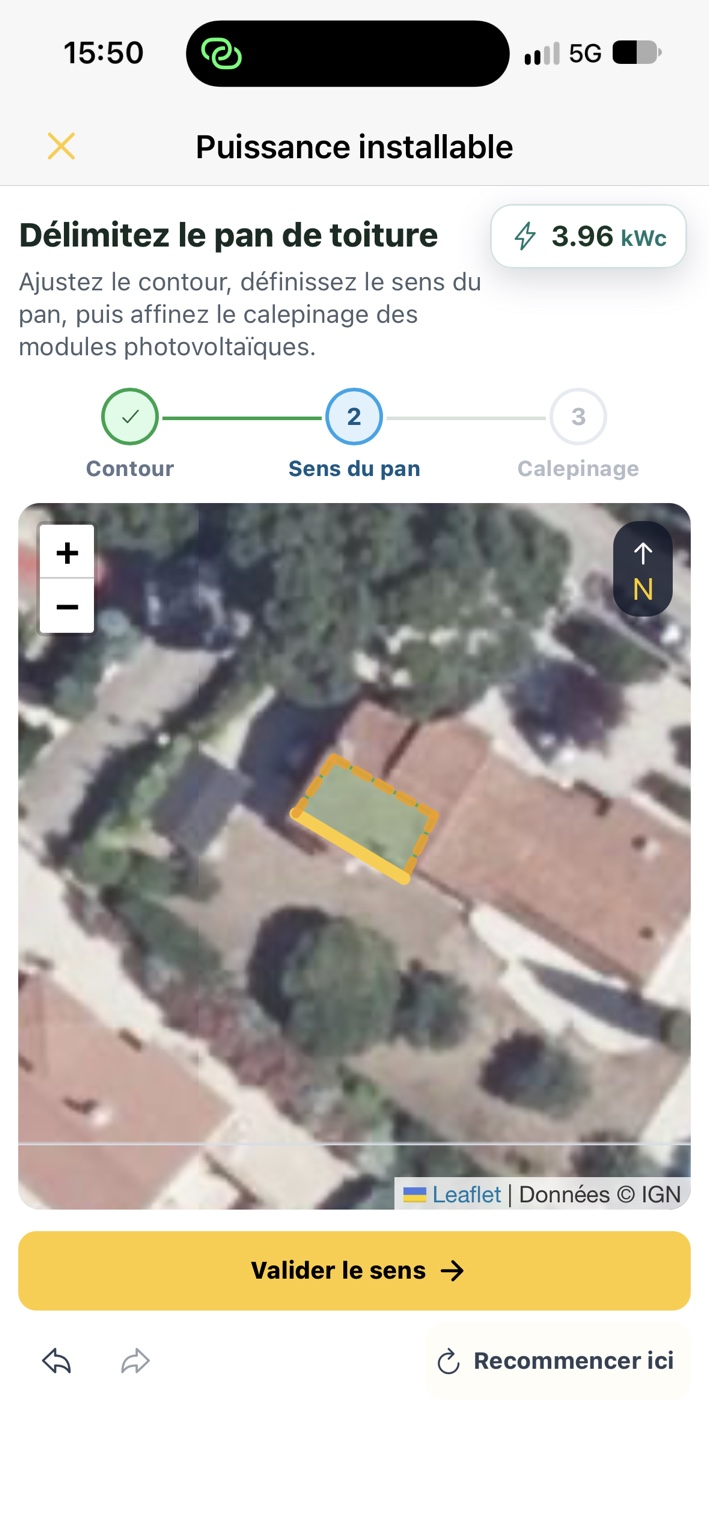
Identify the lower edge
Section titled “Identify the lower edge”On a sloping roof, the lower edge is generally the side towards which water flows, often the gutter edge. The ridge is on the opposite, upper side.
The app prompts you to choose the lower edge of the roof plane to set the azimuth.
- Identify the ridge and lower edge in the aerial view.
- Select the lower edge of the roof outline.
- Check that the selected side matches the slope direction of the roof plane being assessed.
- Tap Confirm direction.
In the screenshot, the solid yellow segment marks the selected edge. The orientation calculated from this choice should match the actual roof slope.
Why this matters
Section titled “Why this matters”Two planes on the same roof can have similar geometry but opposite orientations. Choosing the wrong edge changes the orientation used in PV calculations and can distort the production estimate.
The surface direction is different from the phone’s azimuth during the horizon survey: these measurements serve different purposes.
Correct a mistake
Section titled “Correct a mistake”Before or after confirmation, return to Roof direction where the interface allows it, select the correct edge and confirm again. You can also check the selected value under Roof orientation in the assessment settings.