Configure project settings
The instructions below about deletion before capture describe the legacy single-plane workflow. In a multi-plane project, the selected survey is replaced after validation of the new capture, affecting every plane sharing it; other surveys are retained.
Project settings define the system being assessed and the assumptions used to calculate solar exposure, production, self-consumption and profitability. Open them from the results screen, for example using the edit button. Some shortcuts open a specific section directly.
Understand the six sections
Section titled “Understand the six sections”| Section | What you configure |
|---|---|
| PV sizing | System capacity and area, based on a layout or a known value. |
| Roof orientation | Azimuth and tilt of the PV surface. |
| Modules | Panel dimensions and rated capacity, and spacing for the layout. |
| Horizon profile and shading | Simulated height, point corrections and a new survey. |
| Self-consumption | Site consumption, profile, battery and advanced storage settings. |
| Economy | Costs, electricity tariffs, project lifetime, degradation, maintenance and replacements. |
Tap a section title to open it. After changing the required data, tap Apply at the top to update the assessment. This action may be unavailable if a required field is invalid or analysis access is restricted.
1. PV sizing
Section titled “1. PV sizing”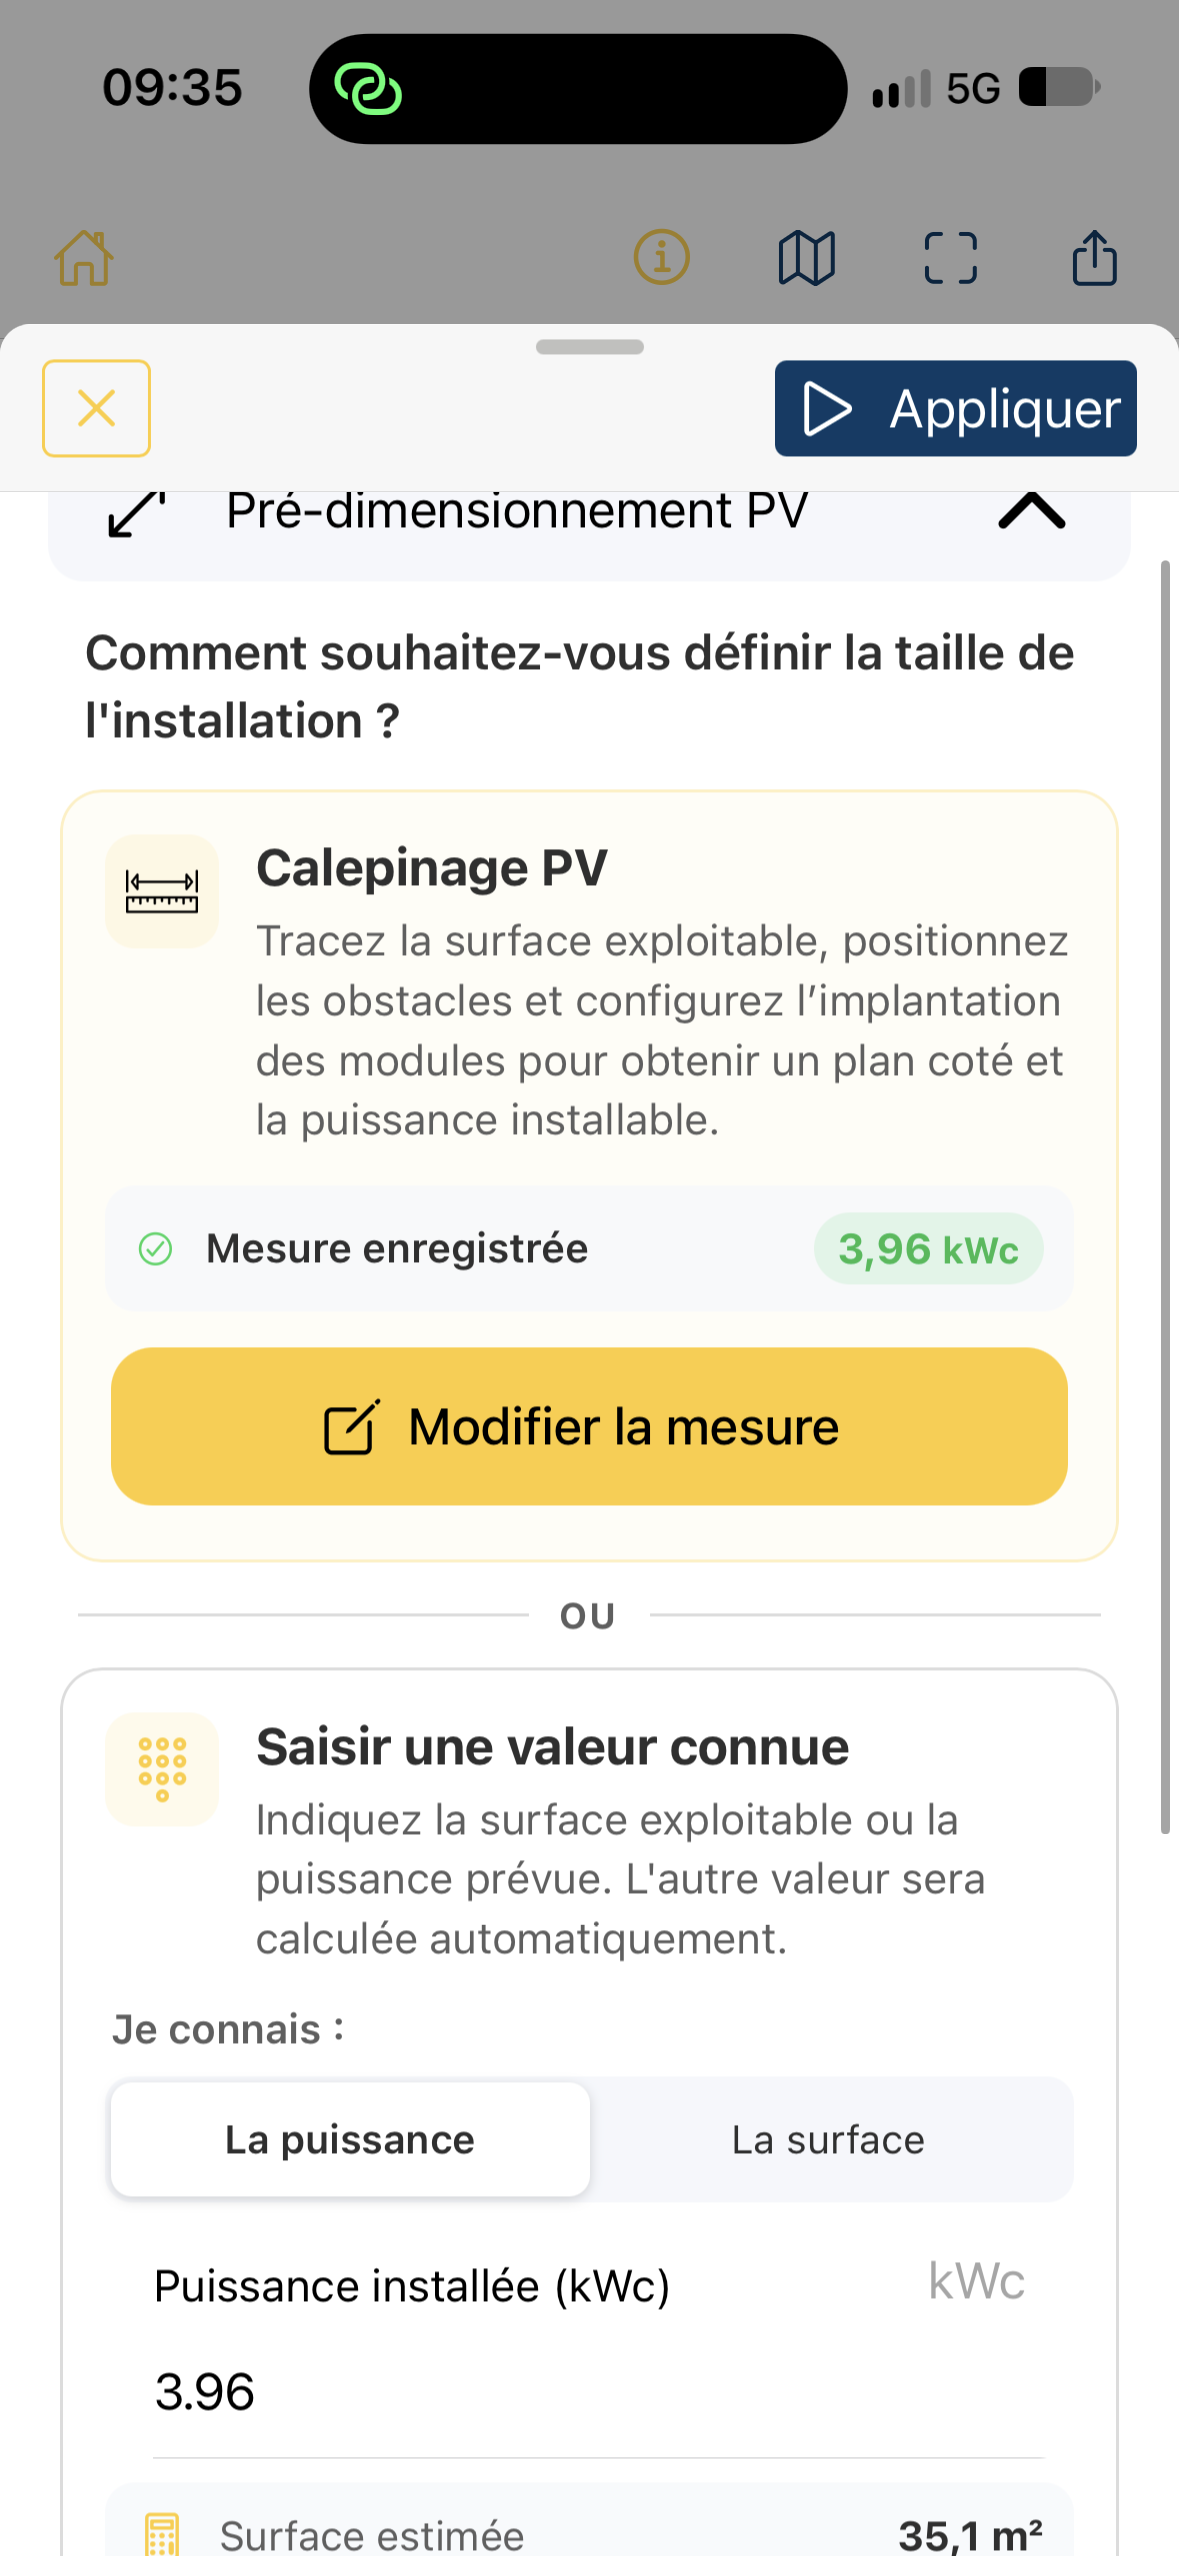
Two methods are available:
- PV layout: outline the roof, add any obstacles and adjust the panel arrangement. The saved measurement shows estimated installable capacity. Edit measurement returns to the layout.
- Enter a known value: select Capacity to enter kWp, or Area to enter m². The app calculates the other quantity using its module and sizing assumptions.
The capacity used for analysis should match the configuration you want to assess. A manual value and a layout-derived capacity are not necessarily identical.
See Determine installable capacity and Adjust the layout.
2. Surface orientation
Section titled “2. Surface orientation”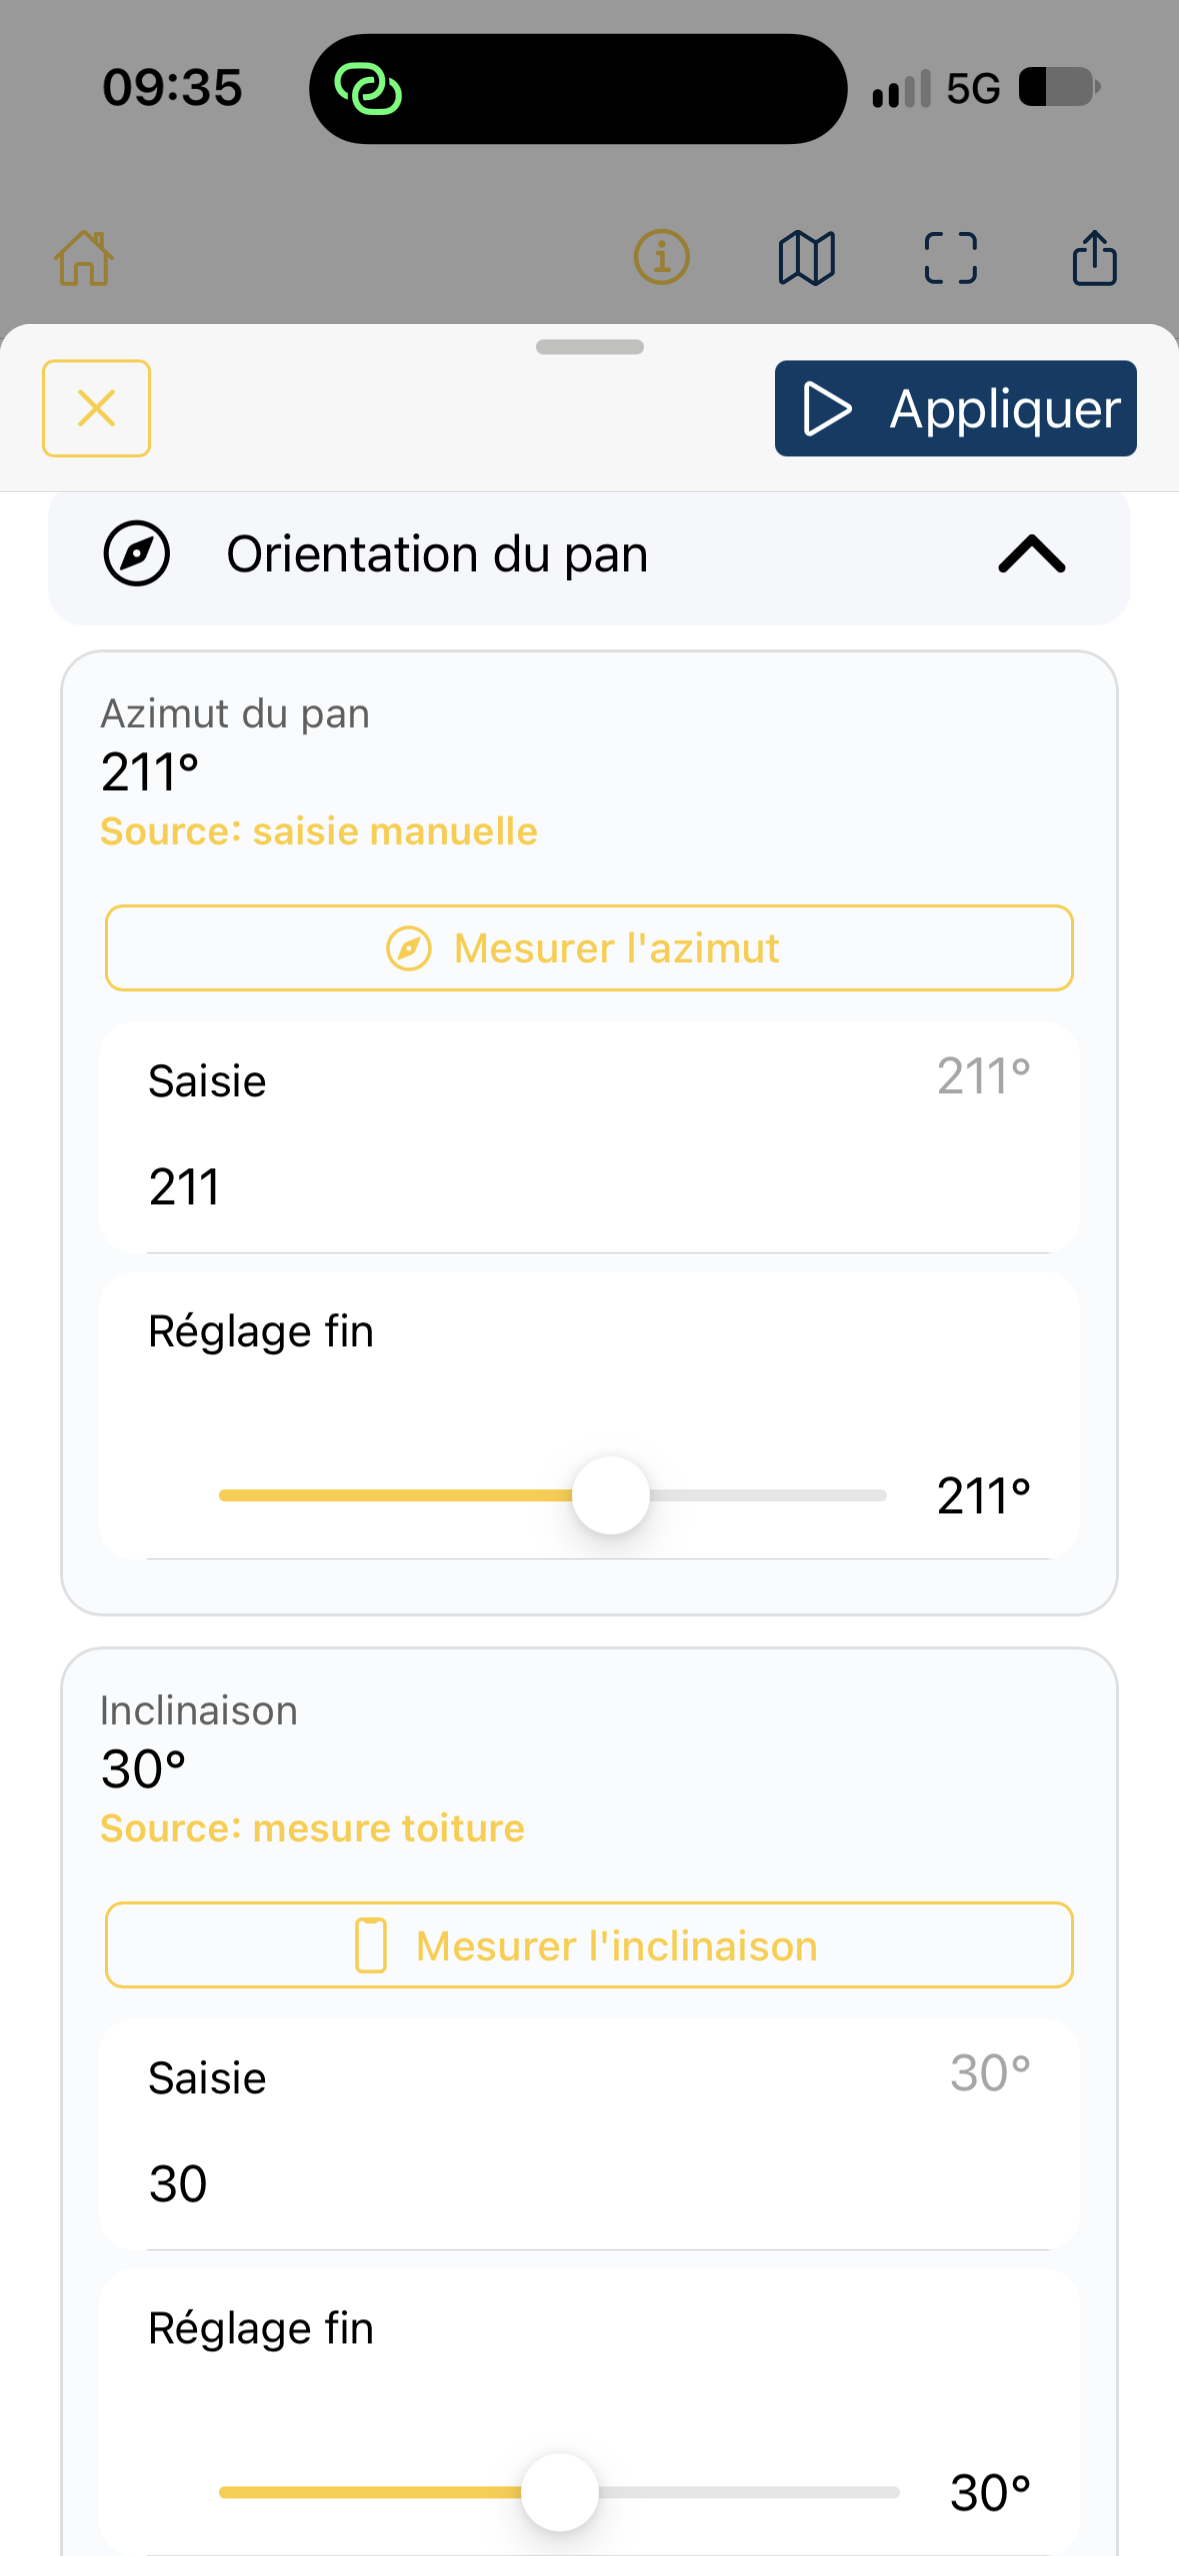
- Surface azimuth: horizontal orientation in degrees. Use Measure azimuth, manual Entry or Fine adjustment. North is 0°, east 90°, south 180° and west 270°.
- Tilt: angle of the surface relative to horizontal, in degrees. Measure it with the available tool or set it manually.
The source below each value indicates whether it comes from a measurement or manual entry. Check the selected value before applying. Surface azimuth is different from the direction the phone was pointing when an obstacle was captured.
3. Modules
Section titled “3. Modules”Under Modules, choose a PV module or enter/create a panel format with its dimensions and rated capacity in Wp, then set horizontal and vertical spacing. These properties are used in layout and installable-capacity estimates.
Preset modules may be available. Check their dimensions if you already have a specific product in mind. The layout also has its own setback and obstacle settings.
4. Horizon and shading
Section titled “4. Horizon and shading”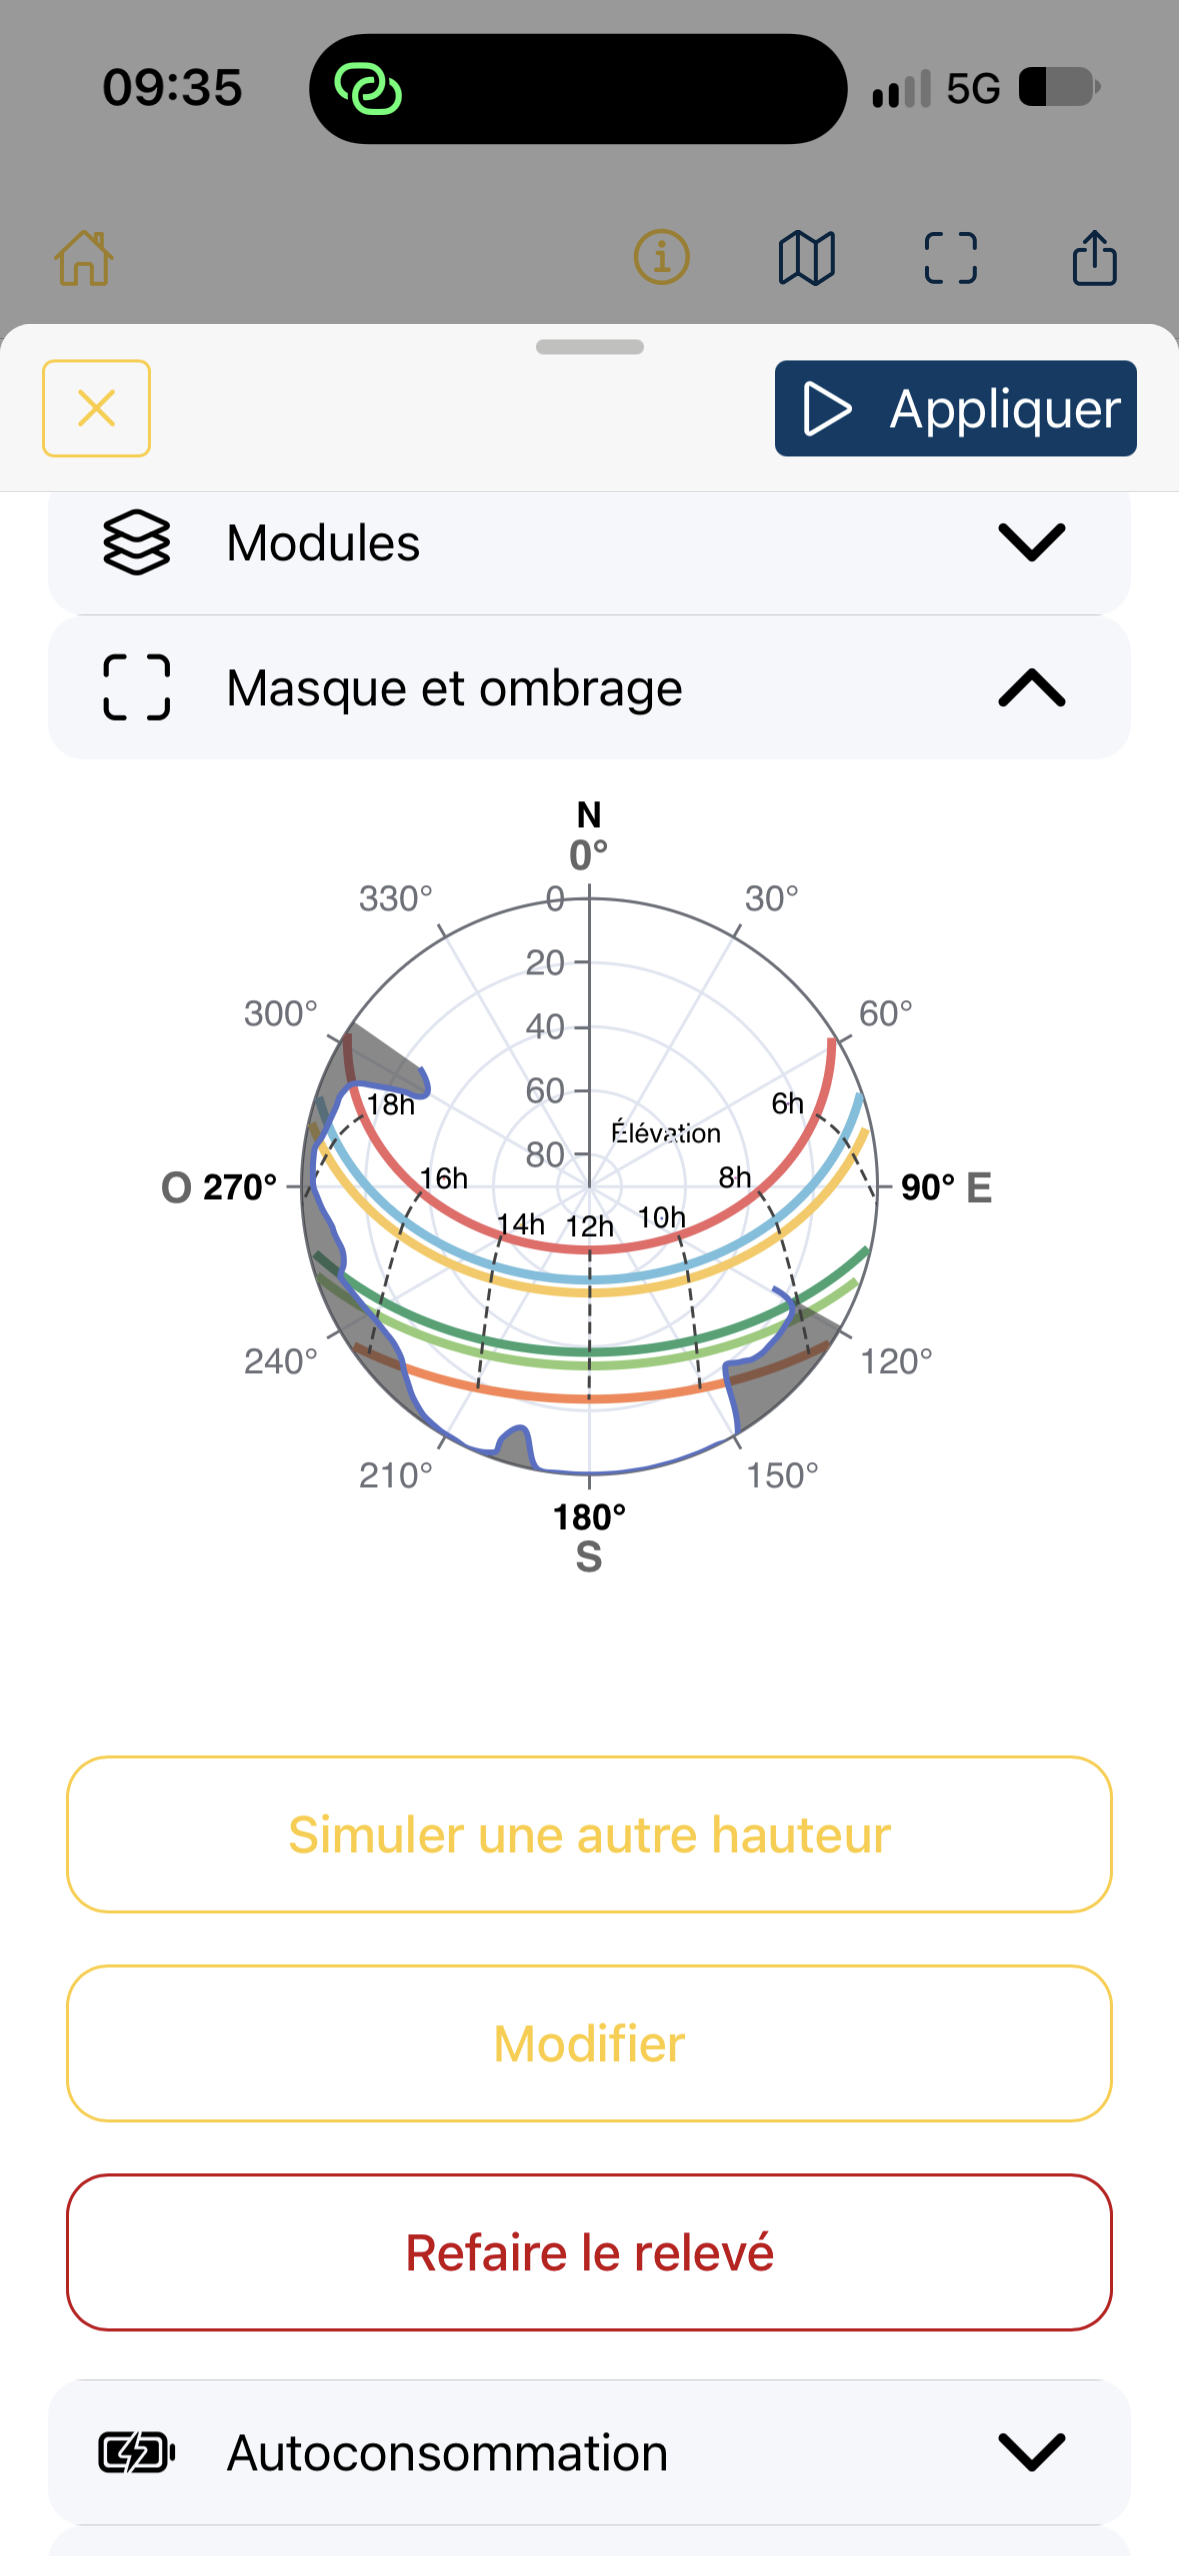
This section shows a horizon diagram and three separate actions:
- Simulate a different height: estimate the effect of a higher measurement position, particularly at roof level, using obstacle distances.
- Edit: open the horizon point table to correct azimuth, elevation or point order.
- Repeat survey: take new site measurements. Confirming permanently deletes the existing survey, its photos and its results before the new capture begins. Duplicate the project first if you want to keep the original assessment.
Manual corrections do not replace a new measurement when an error affects the entire survey. See Read and edit the horizon profile and Simulate another height.
5. Self-consumption
Section titled “5. Self-consumption”Enter annual consumption (kWh/year), choose a consumption profile, then specify whether the assessment includes a battery. In Automatic mode, Azimutis suggests a capacity based on an estimated energy compromise. In Known capacity mode, enter usable capacity (kWh). You can also enter battery cost and maximum charging and discharging power (kW).
For settings and guidance on the capacity-selection chart, see Configure self-consumption and battery.
6. Economics
Section titled “6. Economics”Set the installed PV cost, battery cost where applicable, project lifetime, purchase and export tariffs, and degradation, maintenance and replacement assumptions. The model provides indicative automatic values that you can replace with assumptions from a quotation.
See Set economic assumptions and Set lifetime and replacements.
After editing
Section titled “After editing”Check the capacity, PV cost, azimuth and tilt in the summary at the bottom, then tap Apply. Production and profitability values depend on these assumptions: they are neither a quotation nor a measurement of actual production.
Projects with several planes
Section titled “Projects with several planes”In a multi-plane project, select the plane before editing its sizing, orientation, layout or height. Editing a shared survey affects every plane using it. Consumption, battery and economic assumptions remain common to the installation.